

There are many ways to integrate Arduino with sound. In tutorial #4, we first worked with sound with the light theremin. We will look at some other methods here.
A piezo is a simple way to create sound directly with an Arduino circuit. The sounds will not be complex (or particularly pleasant, depending upon your sensibility), but you can create some squeaky tones, and, as you will see here, even a melody, using a piezo. Note that piezos can also be used as inputs for Arduino.
Here is a basic circuit:
/* Play Melody
 * -----------
 *
 * Program to play a simple melody
 *
 * Tones are created by quickly pulsing a speaker on and off
 *   using PWM, to create signature frequencies.
 *
 * Each note has a frequency, created by varying the period of
 *  vibration, measured in microseconds. We'll use pulse-width
 *  modulation (PWM) to create that vibration.

 * We calculate the pulse-width to be half the period; we pulse
 *  the speaker HIGH for 'pulse-width' microseconds, then LOW
 *  for 'pulse-width' microseconds.
 *  This pulsing creates a vibration of the desired frequency.
 *
 * (cleft) 2005 D. Cuartielles for K3
 * Refactoring and comments 2006 clay.shirky@nyu.edu
 */

// TONES  ==========================================
// Start by defining the relationship between
//       note, period, &  frequency.
#define  c     3830    // 261 Hz
#define  d     3400    // 294 Hz
#define  e     3038    // 329 Hz
#define  f     2864    // 349 Hz
#define  g     2550    // 392 Hz
#define  a     2272    // 440 Hz
#define  b     2028    // 493 Hz
#define  C     1912    // 523 Hz
// Define a special note, 'R', to represent a rest
#define  R     0

// SETUP ============================================
// Set up speaker on a PWM pin (digital 9, 10 or 11)
int speakerOut = 8;
// Do we want debugging on serial out? 1 for yes, 0 for no
int DEBUG = 1;

void setup() {
  pinMode(speakerOut, OUTPUT);
  if (DEBUG) {
    Serial.begin(9600); // Set serial out if we want debugging
  }
}

// MELODY and TIMING  =======================================
//  melody[] is an array of notes, accompanied by beats[],
//  which sets each note's relative length (higher #, longer note)
int melody[] = {  C,  b,  g,  C,  b,   e,  R,  C,  c,  g, a, C };
int beats[]  = { 16, 16, 16,  8,  8,  16, 32, 16, 16, 16, 8, 8 };
int MAX_COUNT = sizeof(melody) / 2; // Melody length, for looping.

// Set overall tempo
long tempo = 10000;
// Set length of pause between notes
int pause = 1000;
// Loop variable to increase Rest length
int rest_count = 100; //<-BLETCHEROUS HACK; See NOTES

// Initialize core variables
int tone_ = 0;
int beat = 0;
long duration  = 0;

// PLAY TONE  ==============================================
// Pulse the speaker to play a tone for a particular duration
void playTone() {
  long elapsed_time = 0;
  if (tone_ > 0) { // if this isn't a Rest beat, while the tone has
    //  played less long than 'duration', pulse speaker HIGH and LOW
    while (elapsed_time < duration) {

      digitalWrite(speakerOut,HIGH);
      delayMicroseconds(tone_ / 2);

      // DOWN
      digitalWrite(speakerOut, LOW);
      delayMicroseconds(tone_ / 2);

      // Keep track of how long we pulsed
      elapsed_time += (tone_);
    }
  }
  else { // Rest beat; loop times delay
    for (int j = 0; j < rest_count; j++) { // See NOTE on rest_count
      delayMicroseconds(duration);
    }
  }
}

// LET THE WILD RUMPUS BEGIN =============================
void loop() {
  // Set up a counter to pull from melody[] and beats[]
  for (int i=0; i<MAX_COUNT; i++) {
    tone_ = melody[i];
    beat = beats[i];

    duration = beat * tempo; // Set up timing

    playTone();
    // A pause between notes...
    delayMicroseconds(pause);

    if (DEBUG) { // If debugging, report loop, tone, beat, and duration
      Serial.print(i);
      Serial.print(":");
      Serial.print(beat);
      Serial.print(" ");
      Serial.print(tone_);
      Serial.print(" ");
      Serial.println(duration);
    }
  }
}
Change the melody to create your own tune.
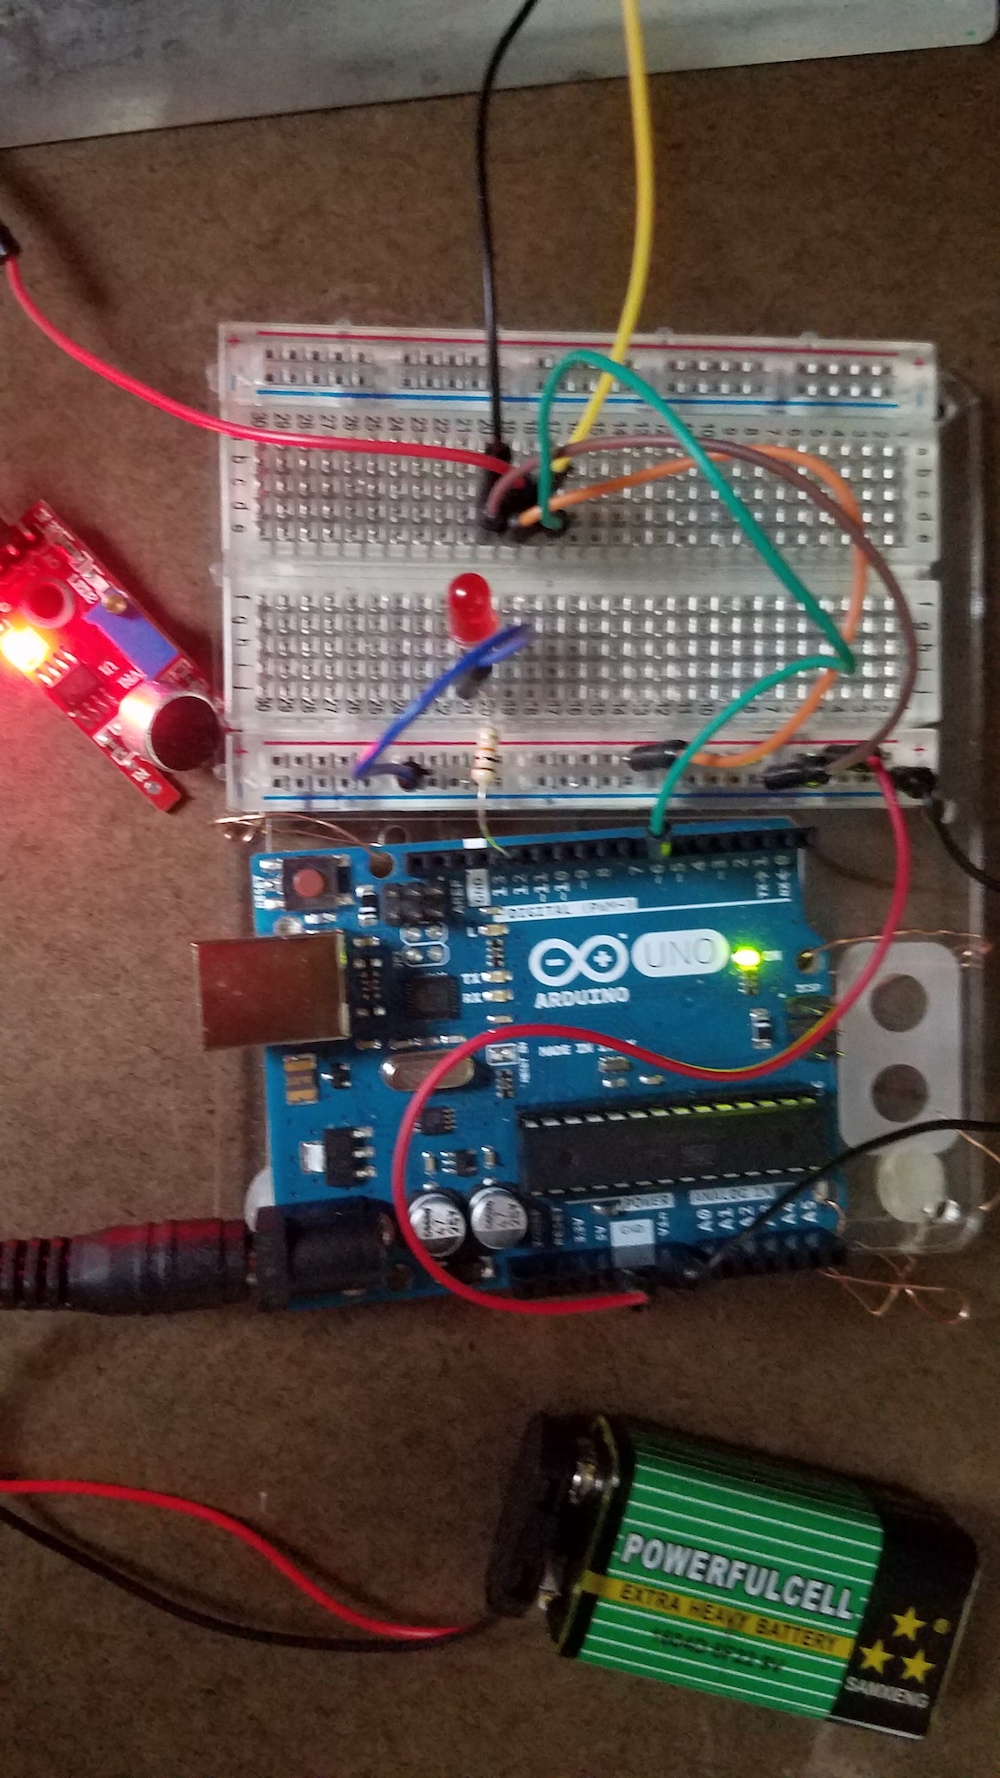
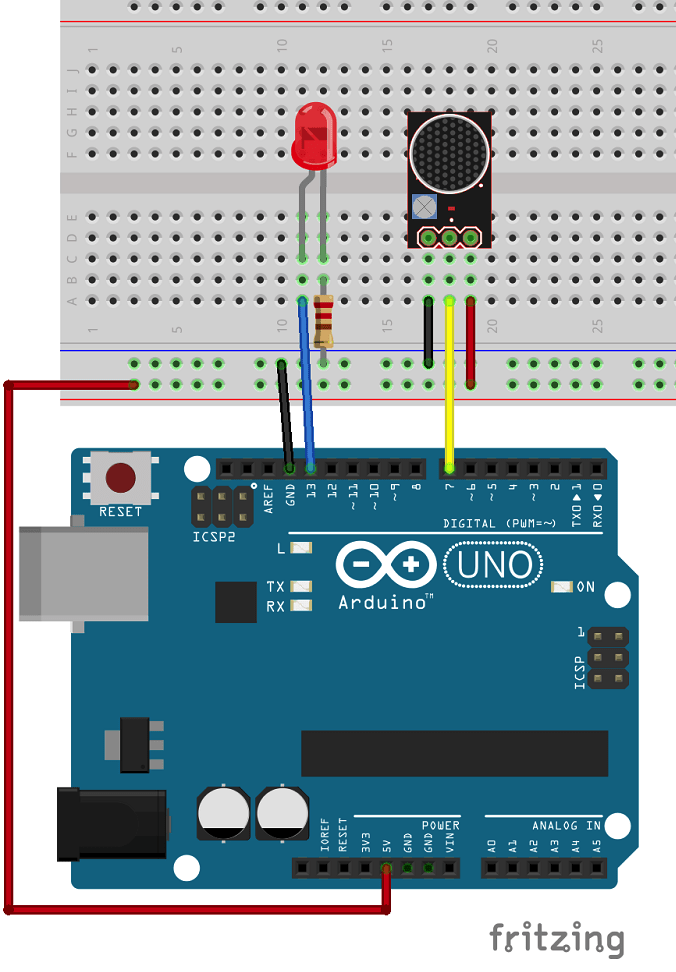
The sound sensor module from your Elegoo kit can detect sound coming in and tell your circuit to do something (such as light up an LED) when it detects sound.
*** Note that there is a tiny potentiometer on your sound sensor that looks like a gold screw. This must be turned to calibrate the sound sensor for your environment.***
Here is a basic circuit:
void setup(){
  Serial.begin(9600);
  pinMode(7, INPUT);
  pinMode(13, OUTPUT);
}
void loop() {
  if(digitalRead(7) == 0){
    Serial.println("no sound detected");
    digitalWrite(13,LOW);
  }
  else {
    Serial.println("sound detected");
    digitalWrite(13, HIGH);
  }

  delay(250);
}
This module allows you to upload mp3 files to a mini SD card and play them into headphones or speakers, all controlled by Arduino.
Here is a basic circuit:
//code rearranged by Javier Muñoz 10/11/2016 ask me at javimusama@hotmail.com
#include <SoftwareSerial.h>

#define ARDUINO_RX 5//should connect to TX of the Serial MP3 Player module
#define ARDUINO_TX 6//connect to RX of the module
SoftwareSerial mySerial(ARDUINO_RX, ARDUINO_TX);//init the serial protocol, tell to myserial which pins are TX and RX

////////////////////////////////////////////////////////////////////////////////////
//all the commands needed in the datasheet(http://geekmatic.in.ua/pdf/Catalex_MP3_board.pdf)
static int8_t Send_buf[8] = {0} ;//The MP3 player undestands orders in a 8 int string
                                 //0X7E FF 06 command 00 00 00 EF;(if command =01 next song order)
#define NEXT_SONG 0X01
#define PREV_SONG 0X02

#define CMD_PLAY_W_INDEX 0X03 //DATA IS REQUIRED (number of song)

#define VOLUME_UP_ONE 0X04
#define VOLUME_DOWN_ONE 0X05
#define CMD_SET_VOLUME 0X06//DATA IS REQUIRED (number of volume from 0 up to 30(0x1E))
#define SET_DAC 0X17
#define CMD_PLAY_WITHVOLUME 0X22 //data is needed  0x7E 06 22 00 xx yy EF;(xx volume)(yy number of song)

#define CMD_SEL_DEV 0X09 //SELECT STORAGE DEVICE, DATA IS REQUIRED
                #define DEV_TF 0X02 //HELLO,IM THE DATA REQUIRED

#define SLEEP_MODE_START 0X0A
#define SLEEP_MODE_WAKEUP 0X0B

#define CMD_RESET 0X0C//CHIP RESET
#define CMD_PLAY 0X0D //RESUME PLAYBACK
#define CMD_PAUSE 0X0E //PLAYBACK IS PAUSED

#define CMD_PLAY_WITHFOLDER 0X0F//DATA IS NEEDED, 0x7E 06 0F 00 01 02 EF;(play the song with the directory \01\002xxxxxx.mp3

#define STOP_PLAY 0X16

#define PLAY_FOLDER 0X17// data is needed 0x7E 06 17 00 01 XX EF;(play the 01 folder)(value xx we dont care)

#define SET_CYCLEPLAY 0X19//data is needed 00 start; 01 close

#define SET_DAC 0X17//data is needed 00 start DAC OUTPUT;01 DAC no output
////////////////////////////////////////////////////////////////////////////////////

void setup()
{
  Serial.begin(9600);//Start our Serial coms for serial monitor in our pc
mySerial.begin(9600);//Start our Serial coms for THE MP3
delay(500);//Wait chip initialization is complete
   sendCommand(CMD_SEL_DEV, DEV_TF);//select the TF card
delay(200);//wait for 200ms
}
void loop()
{
sendCommand(CMD_PLAY_WITHVOLUME, 0X0F01);//play the first song with volume 15 class
delay(1000000);//the programm will send the play option each 100 seconds to the catalex chip
}

void sendCommand(int8_t command, int16_t dat)
{
 delay(20);
 Send_buf[0] = 0x7e; //starting byte
 Send_buf[1] = 0xff; //version
 Send_buf[2] = 0x06; //the number of bytes of the command without starting byte and ending byte
 Send_buf[3] = command; //
 Send_buf[4] = 0x00;//0x00 = no feedback, 0x01 = feedback
 Send_buf[5] = (int8_t)(dat >> 8);//datah
 Send_buf[6] = (int8_t)(dat); //datal
 Send_buf[7] = 0xef; //ending byte
 for(uint8_t i=0; i<8; i++)//
 {
   mySerial.write(Send_buf[i]) ;//send bit to serial mp3
   Serial.print(Send_buf[i],HEX);//send bit to serial monitor in pc
 }
 Serial.println();
}
Arduino Mp3 player + Distance Sensor
Note: You can also integrate Arduino inputs with sound triggers that occur in Processing. In the next tutorial, we will do something similar with video.
Back to Top