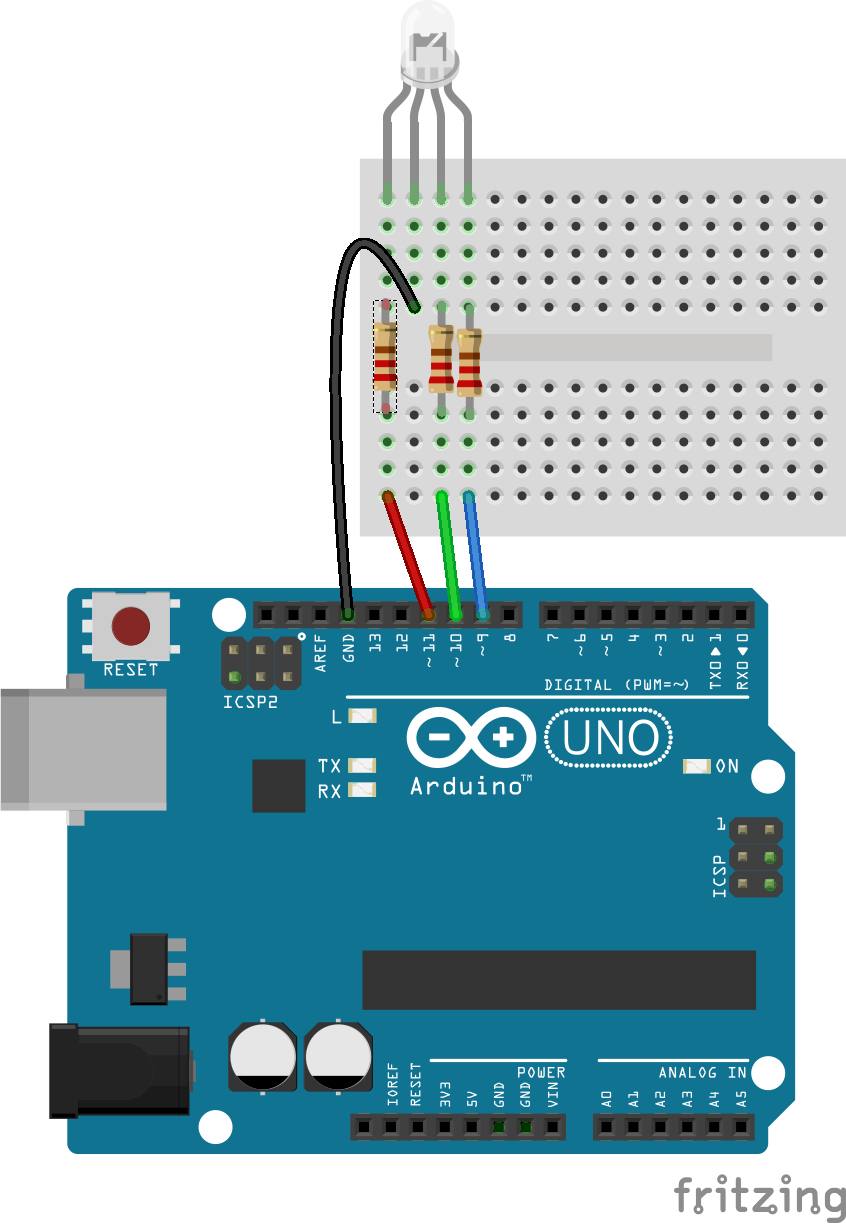

Here, you will use a special type of LED that can change colors based on how it is programmed. Your RGB color-changing LED has 4 legs. The longest leg is Ground (-) and the 3 other legs represent red (R), green (G) and blue (B). Each of the R, G and B legs will be attached to a different digital pin on your Arduino. Then their values can be programmed individually.
Here is a basic circuit:
/*
created by Muhammad Aqib
published December 26, 2018

Code from:
https://create.arduino.cc/projecthub/muhammad-aqib/arduino-rgb-led-tutorial-fc003e
*/

int red_light_pin= 11;
int green_light_pin = 10;
int blue_light_pin = 9;
void setup() {
  pinMode(red_light_pin, OUTPUT);
  pinMode(green_light_pin, OUTPUT);
  pinMode(blue_light_pin, OUTPUT);
}
void loop() {
  RGB_color(255, 0, 0); // Red
  delay(1000);
  RGB_color(0, 255, 0); // Green
  delay(1000);
  RGB_color(0, 0, 255); // Blue
  delay(1000);
  RGB_color(255, 255, 125); // Raspberry
  delay(1000);
  RGB_color(0, 255, 255); // Cyan
  delay(1000);
  RGB_color(255, 0, 255); // Magenta
  delay(1000);
  RGB_color(255, 255, 0); // Yellow
  delay(1000);
  RGB_color(255, 255, 255); // White
  delay(1000);
}
void RGB_color(int red_light_value, int green_light_value, int blue_light_value)
 {
  analogWrite(red_light_pin, red_light_value);
  analogWrite(green_light_pin, green_light_value);
  analogWrite(blue_light_pin, blue_light_value);
}
Try adjusting the code to make your own pattern of color and light. You can also begin to think about extending the legs of your LED with male-to-male jumper wires. And what about housing? How can you encase your LED to make a glowing structure, amplifying its light?