If you want to use a higher power source than the Arduino is able to offer then you can use an N-Channel MOSFET. This can be used for high power LEDs, motors, resistance wire and any kind of heating elements. These come in different shapes and sizes (voltages and currents) but we have at hand the multi-purpose FQP 30NO6L.
There is lot’s of additional information on N-Channel MOSFET here.
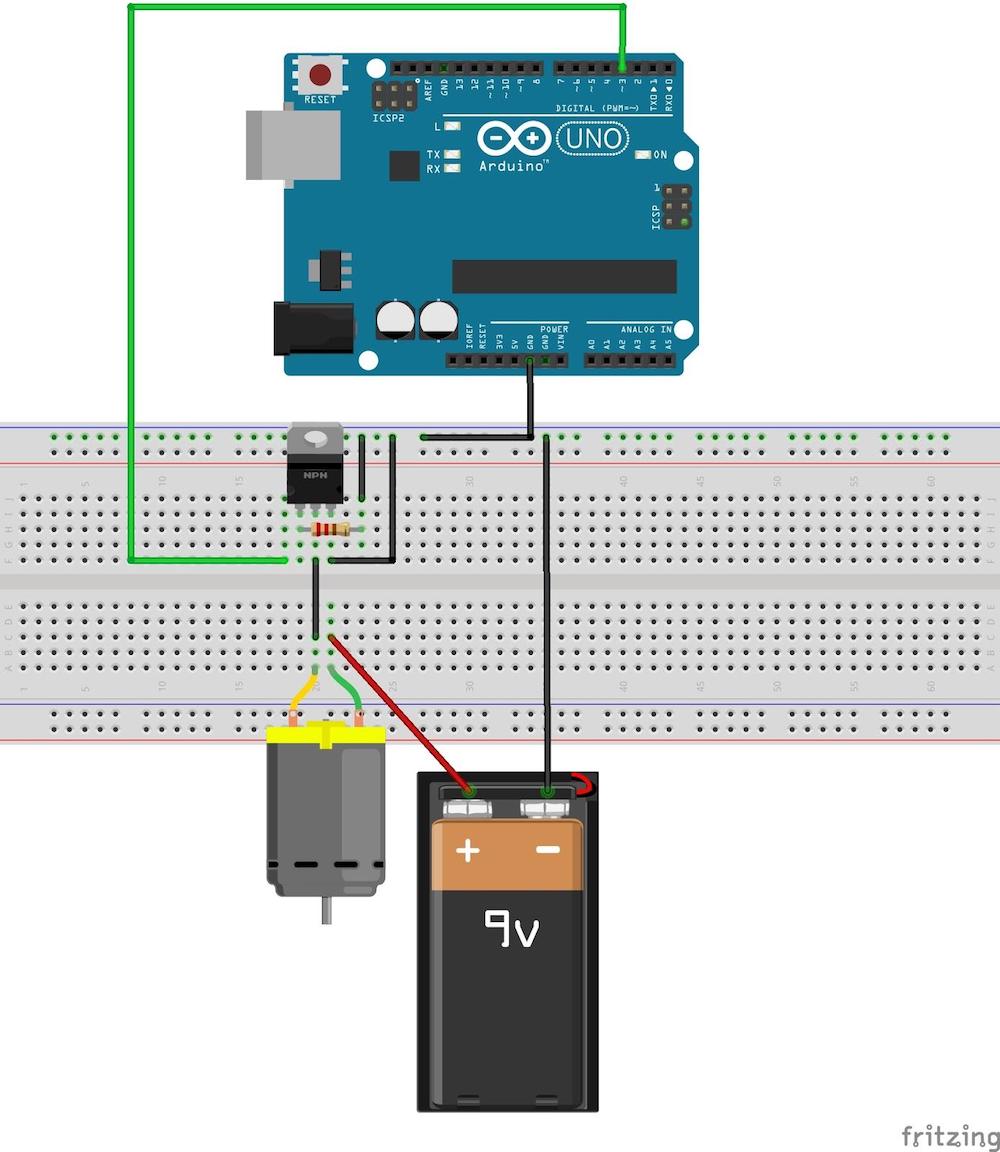
Here is a basic circuit:
In this circuit diagram I use a motor and a 9V battery, however, the same circuit applies for controlling any higher power source. There is no example code per se, because all you have to do is switch the green wire (connected to pin 3 below) HIGH in your code. You can also fade or control the voltage of the higher power sources using PWM as you would to fade any LED with the Arduino.
To test the MOSFET you can use:
File > Examples > Basics > Blink (make sure to change the pin number)
Or
File > Examples > Basics > Fade (make sure to use pin 3, 6 or 9 for PWM)
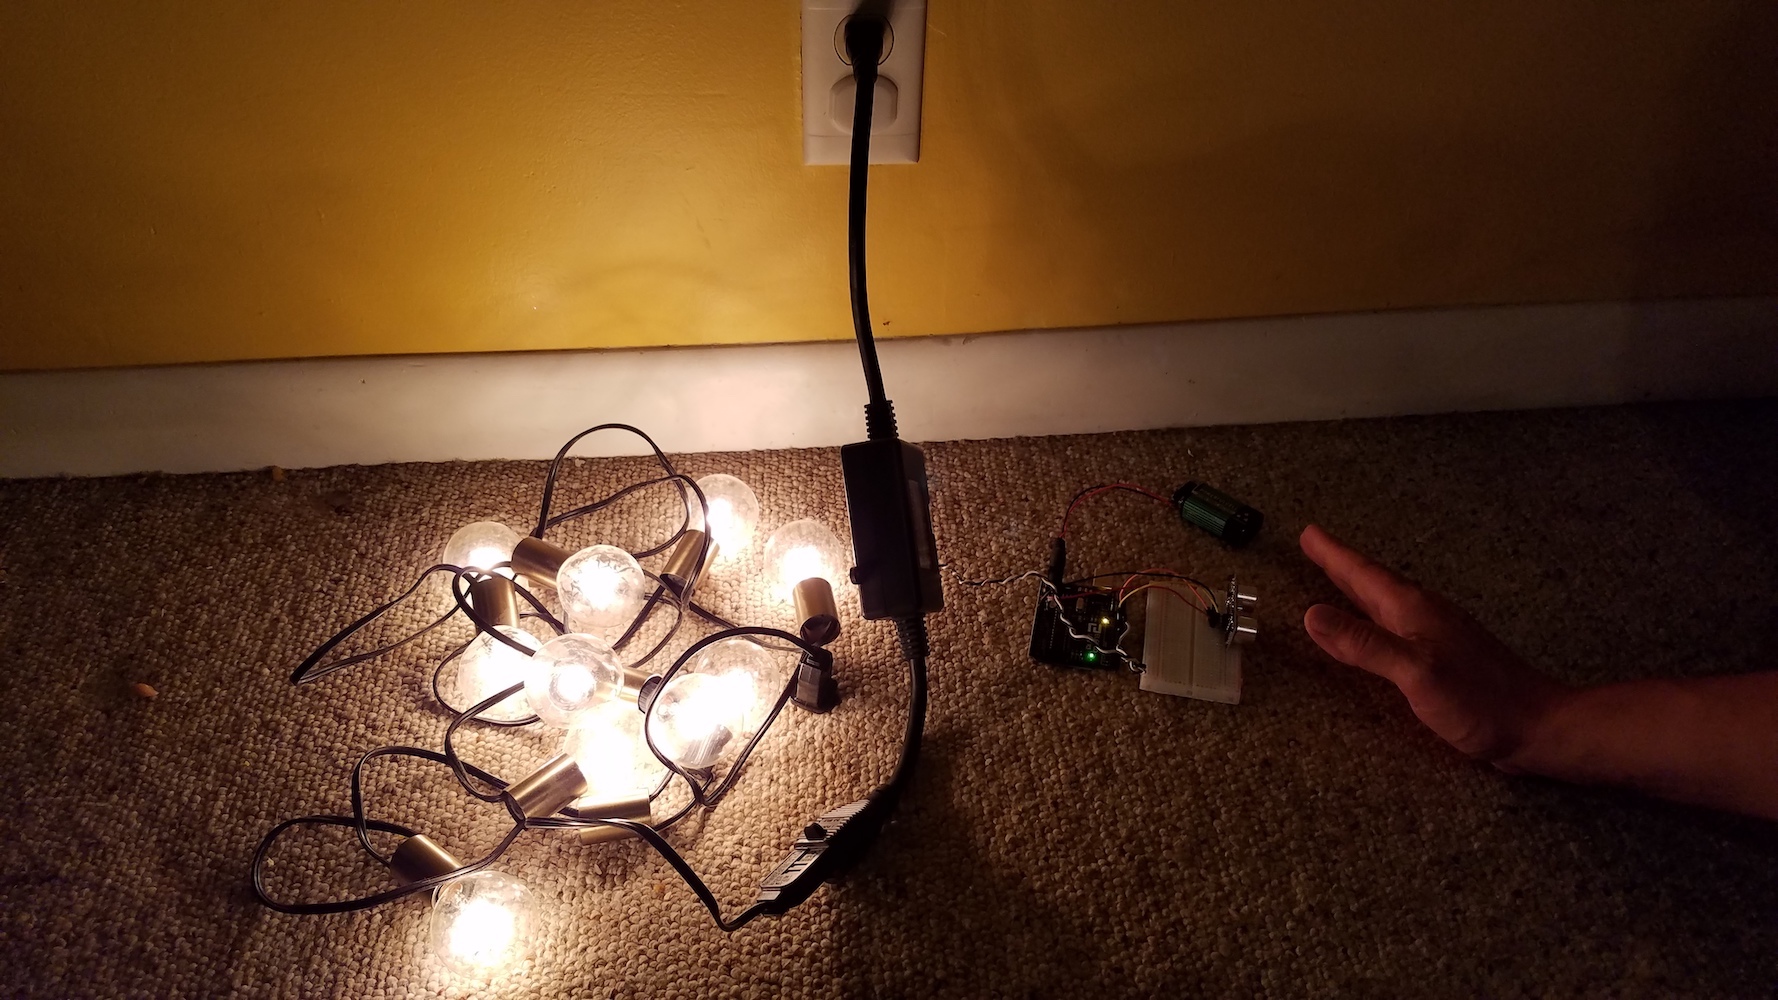
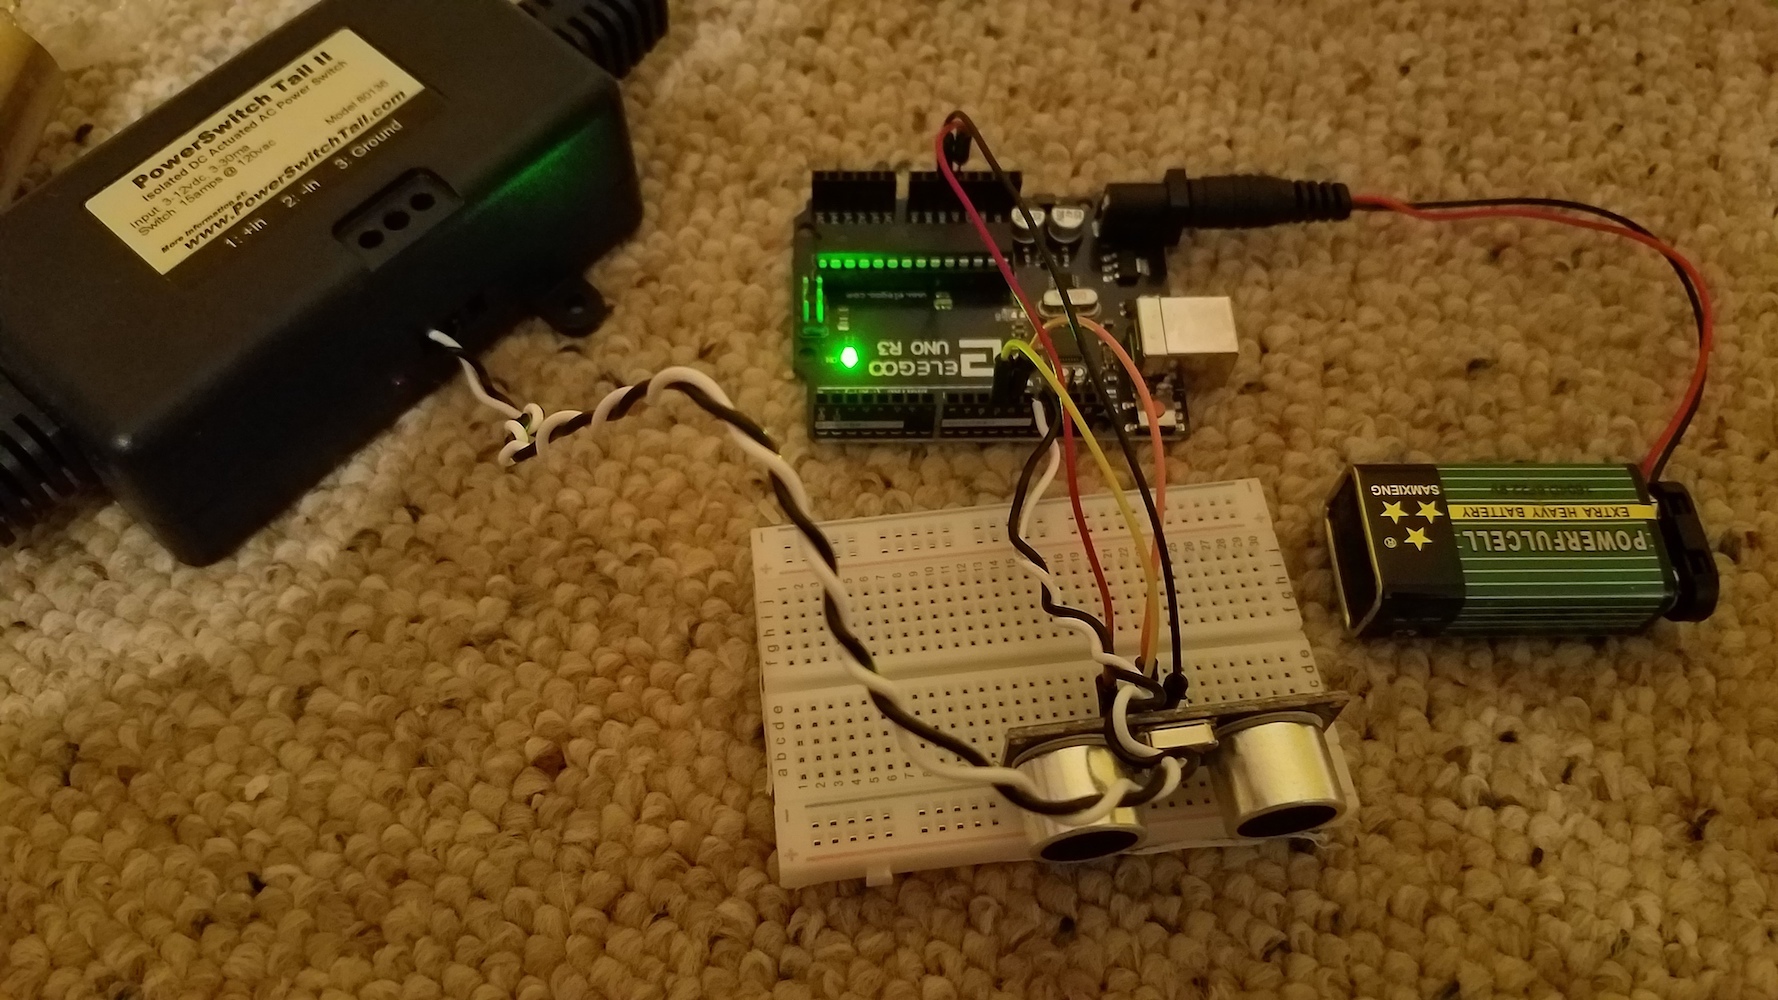
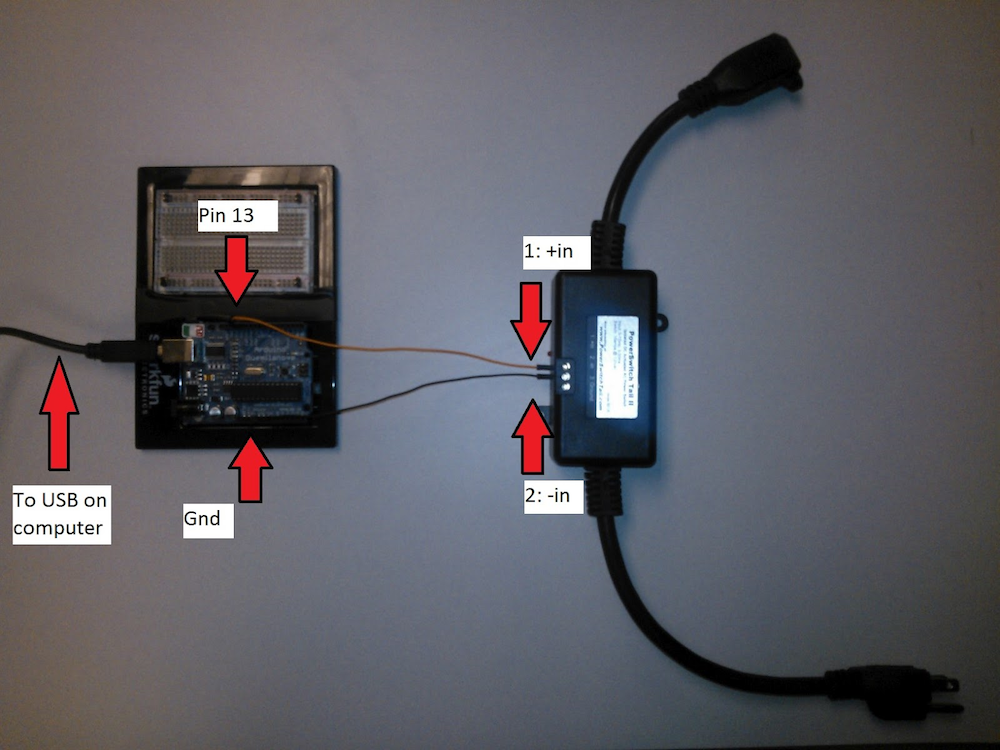
The Powerswitch Tail Relay can be a safe and easy way to hook up a 120V item (fan, lamp, etc.) to be powered on with Arduino. Be careful when you are working with 120V power and always unplug/power down all elements of the circuits before changing around wires. Here, we will see how to turn on a 120V item (such as a string of lights) when someone approaches an ultrasonic ping sensor.
Here is a basic circuit:
#include <NewPing.h>

#define TRIGGER_PIN 11
#define ECHO_PIN 12
#define MAX_DISTANCE 200

// NewPing setup of pins and maximum distance
NewPing sonar(TRIGGER_PIN, ECHO_PIN, MAX_DISTANCE);

void setup() {
  Serial.begin(9600);
  pinMode(13, OUTPUT);
}

void loop() {
    delay(150);
    unsigned int distance = sonar.ping_cm();
    Serial.println(distance);
    //Serial.write(distance);
     //Serial.println("cm");

   if(distance <= 11){
      digitalWrite(13, HIGH); // Turn the Powertail on
      Serial.println("Switch ON");
   } else {
      digitalWrite(13, LOW); // Turn the Powertail on
      Serial.println("Switch OFF");
   }
}